Email Design

Variety is the spice of life

It’s very easy to fall into the trap of doing the same things week in, week out when creating emails. This formulaic approach may be useful if you have limited resources to develop your email campaigns and rely on set layouts for speed. However, without enough variety (variety is after all the spice of life) this could lead to your readers just skimming over their emails, feeling like they’ve seen it all before and failing to absorb the content.

“Hey, we’ve got a sale on this week!”
“Here’s some of our best sellers!”
“Hey, it’s another sale!”
“Guess what, we’ve extended the sale!”

Using the same format and style is of course fine to maintain brand identity and make your emails instantly recognisable, but NOT the same content. One obvious mistake to avoid is to keep using the same hero image email after email.

Repeated Heroe Images

The hero image is the first thing your readers will see, so this is your best opportunity to grab their attention. If you repeat it 4, 5 even 6 times in a row the likelihood is they will nod off.

Spice up your emails

So how can you spice up your emails? My first suggestion is…

Tap into the hectic melee that is “day” celebrations

Yes, a good old fashioned themed email. You’ve got a whole host of National, International and even World Days that cover every day of the year and there simply MUST be at least one that fits in with your brand identity.

You’re a chocolatier? 7th July is “World Chocolate Day”.
You sell animal products? January 14th is “National Dress Up Your Pet Day”.
Swimwear? Why, 5th July is “National Bikini Day”.
I’m a stationer – nobody could possibly celebrate the humble pen and paper? Oh yes, they do…for a whole week every year in the middle of May!

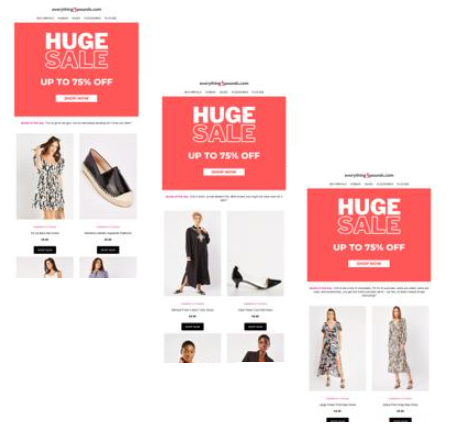
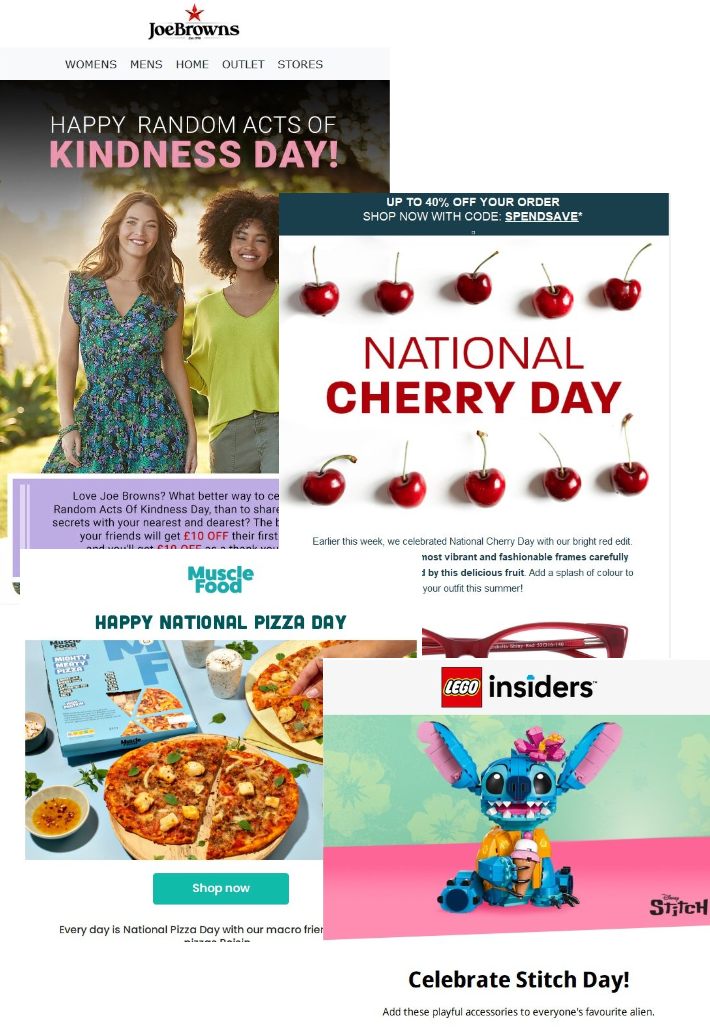
The sillier the better to entice your readers in. 21st June is World Giraffe day? You’re having a giraffe! Here’s how some companies have been making use of these type of days for some one-off, attention grabbing campaigns:

Day Email Combo

To get started, here are a few useful sites to look up for inspiration:

https://www.un.org/en/observances/list-days-weeks
https://www.awarenessdays.com/
https://www.nationaldaycalendar.com

Next up…

CSS effects

CSS is typically used for prettifying websites but it is available for use in email design, albeit slightly more primitively, and is often overlooked. You can use it for things like fixed positioning, parallax scrolling with perspective attribute, manipulating 3D objects – all of this will enhance your emails and garner that coveted attention.

It has its drawbacks as it is not supported everywhere, but if you have decent fallbacks there is no excuse for not implementing some of these tricks.

And another thing about CSS…

Information as images

Life is changing – people just don’t want to read anything for any length of time anymore. So we really need a way to condense lots of information into something digestible. Here’s where CSS can step in again turning your data into eye-catching charts.

Gauge Chart

Is there anything else you can do with CSS?

Surveys

It is possible to insert simple surveys into your emails without sending anyone to any external site. By reducing the steps in the user journey you are likely to get both a higher response and email engagement rate. Why not check out Development Project 4 to see it in action. We can provide the ability to capture the responses in a database and then view the results.

And?

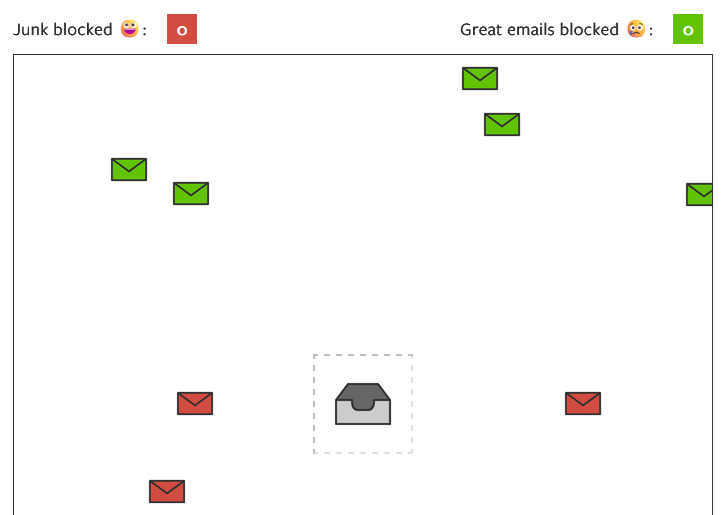
Games

Simple games can be included to play inside the email which is a great user experience. Simple doesn’t mean not fun! If they can’t play because it’s not supported, they can be directed to a browser to get the same experience.

Gamify your emails

Game in action

If you want to see it for yourself in action, just enter your email below and we’ll send you the Black Friday special we made (don’t worry, we won’t use your email for anything else):

Finally…

Interactivity

To get your users to engage, give them something to actively engage with. As humans, we are pre-programmed to wonder what a button does, consequences be damned. Fortunately, most emails aren’t going to trigger a bomb with the mere click of a link, but you can still offer up a little more spice before directing them to your website.

We’ve come up with 4 useful ideas for interactive things that can be included in your emails across a range of industries, from colour palettes to rotatable products to see every angle. The possibilities with adding interactivity are ever growing and will boost the attractiveness of your emails no end.

Just get in touch if you need help with implementing any of this in your emails. You can also become an interactive master by checking out our complete guide to interactive email.

Email coding

Become an interactive email master

Open, read, click. That’s all there is to email, right? Wrong!

Thanks to some clever coding techniques, email can become a rich interactive environment. Quizzes, menus, surveys, games – you name it. Your imagination is the limit.

Pushing the boundaries of a medium is of course no small task. But we’ve got you covered. Download our 86-page Complete Guide to Interactive Email, and your brand could be sending world-class interactive mailings before you know it.

Get the guide

Front cover of the Complete Guide to Interactive Email

Sneak preview

Our guide covers everything you need to know about interactive email. The whats, the hows, the whys. Here’s what to expect:

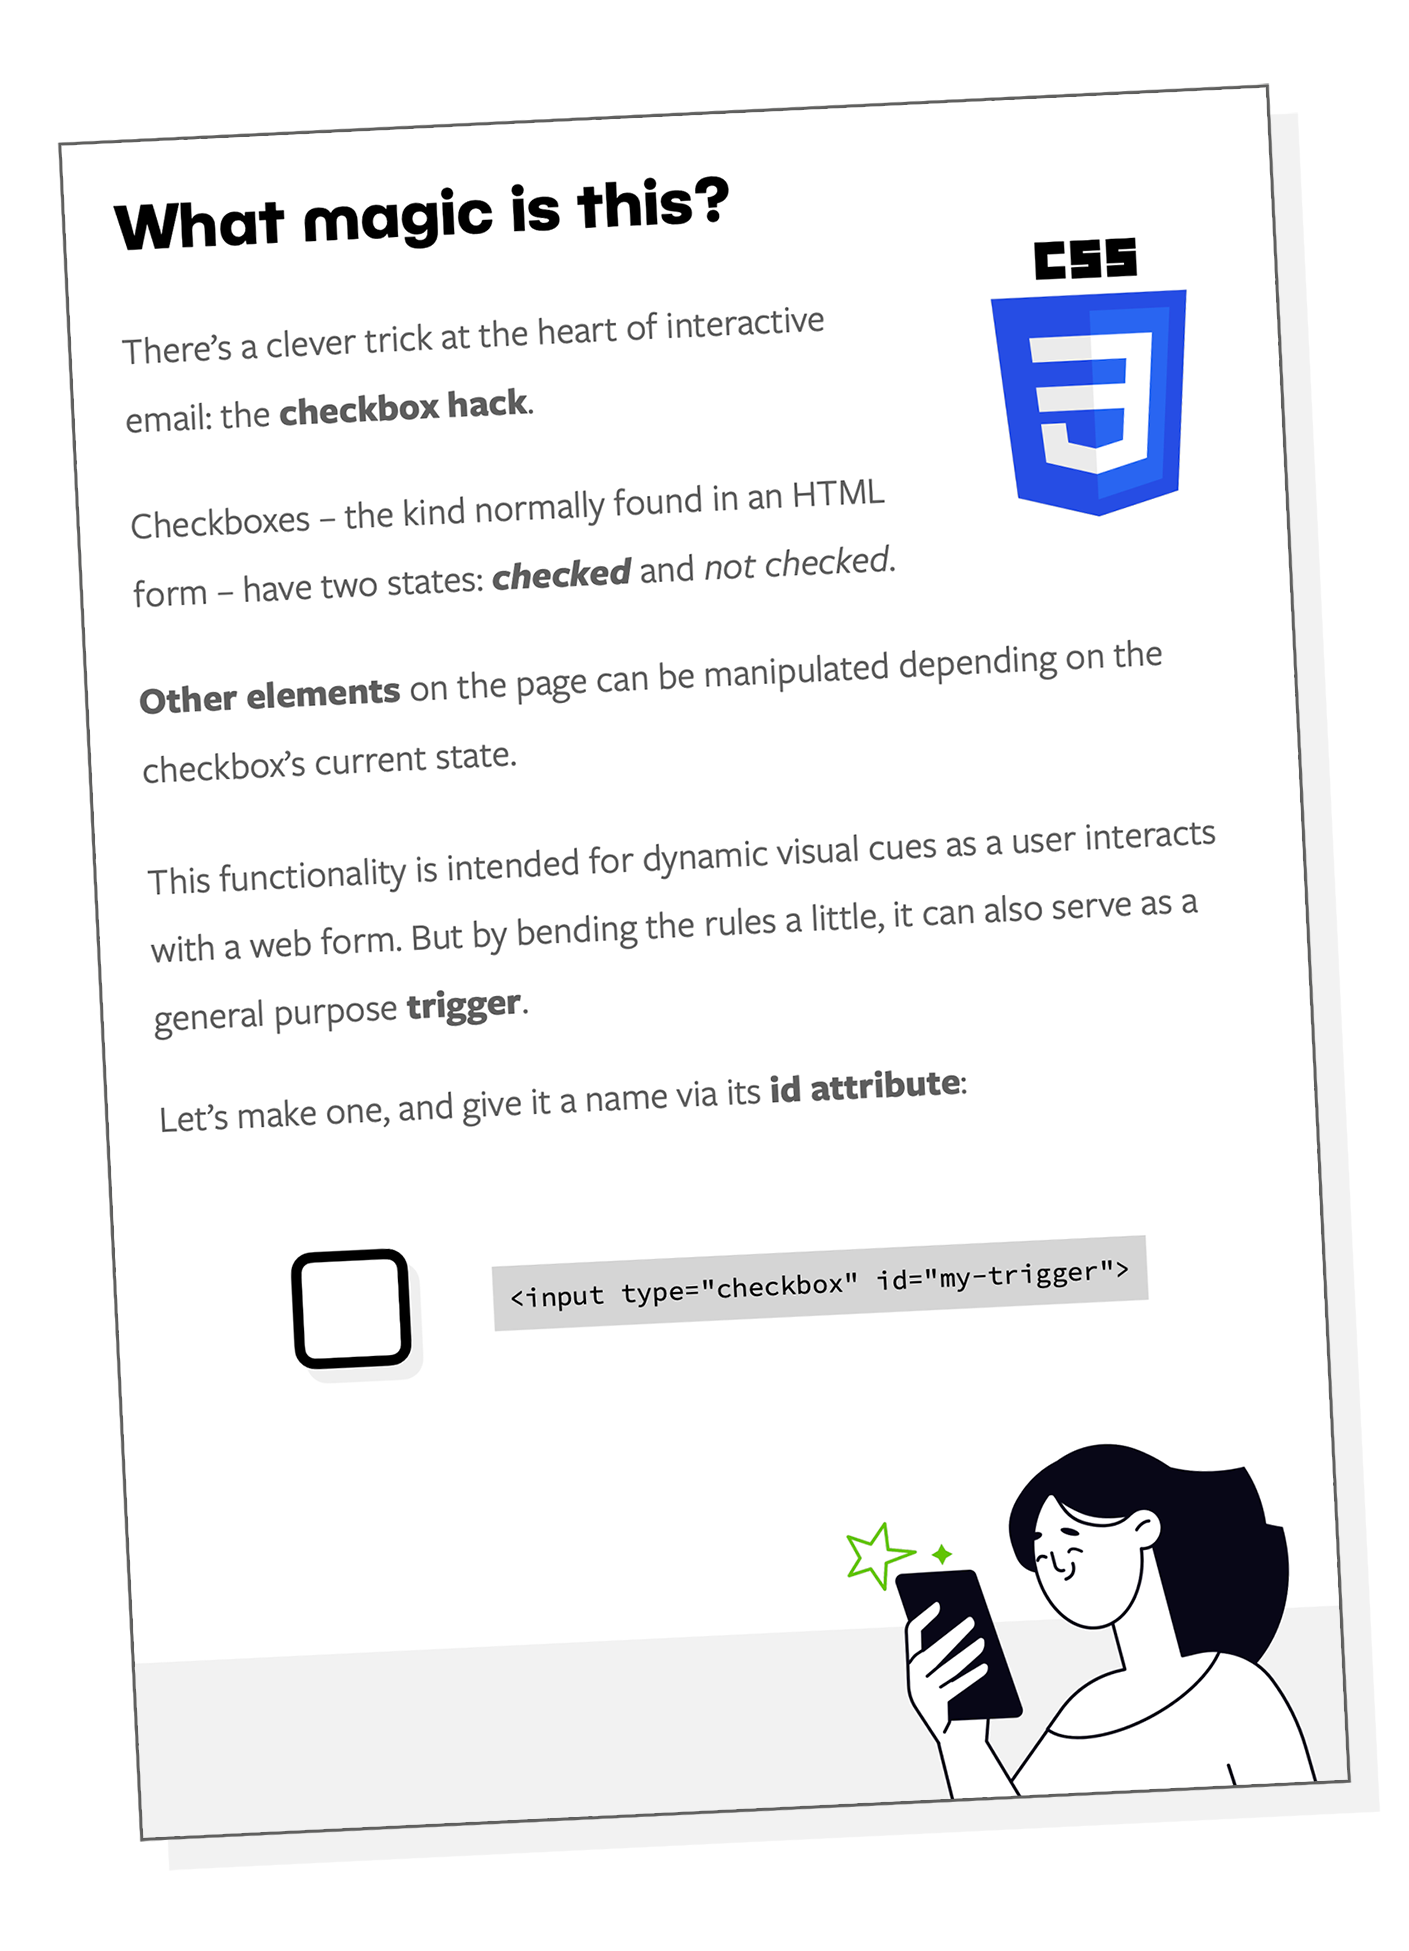
  • An in-depth guide to the checkbox hack – the CSS technique that makes interactivity possible.
  • Downloadable demo files. Experiment with and learn from existing code.
  • Examples of the coolest interactive content possible.
  • Our tips for content, accessibility, animation, design and more.

Page from the guide about the checkbox hack

Set your brand apart

Interactive content is experimental. Most brands currently send mailings of a more traditional nature. There’s nothing wrong with that, of course. But there’s a lot right with putting your brand at the forefront of email. Make your customers excited to open your emails and the rewards will speak for themselves.

Get involved

Email is niche, and interactive email is even niche-er! We’d love to hear about your interactive content projects, big or small.

Email coding

Totally random

Do you like surprises? Your customer might. We all know about the value of personalisation in email, but is there room too for a touch of randomisation?

Randomisation as a feature

First things first. We don’t mean dropping random content into emails like some kind of scattershot A/B test, or A/B/C/D/E/F/G test for that matter. We’re talking about the element of chance as an interactive feature. Think along the lines of spin-the-wheel, where the user is aware that they can trigger a random result. And, crucially, that they want to.

How it works

Randomisation is a form of interactive email. The state of an input element – i.e. a checkbox or radio button – can be used to toggle styling on any number of other elements on the page. That lets you show, hide, move or otherwise change content in your email based on the user’s actions. This technique is known as the checkbox hack.
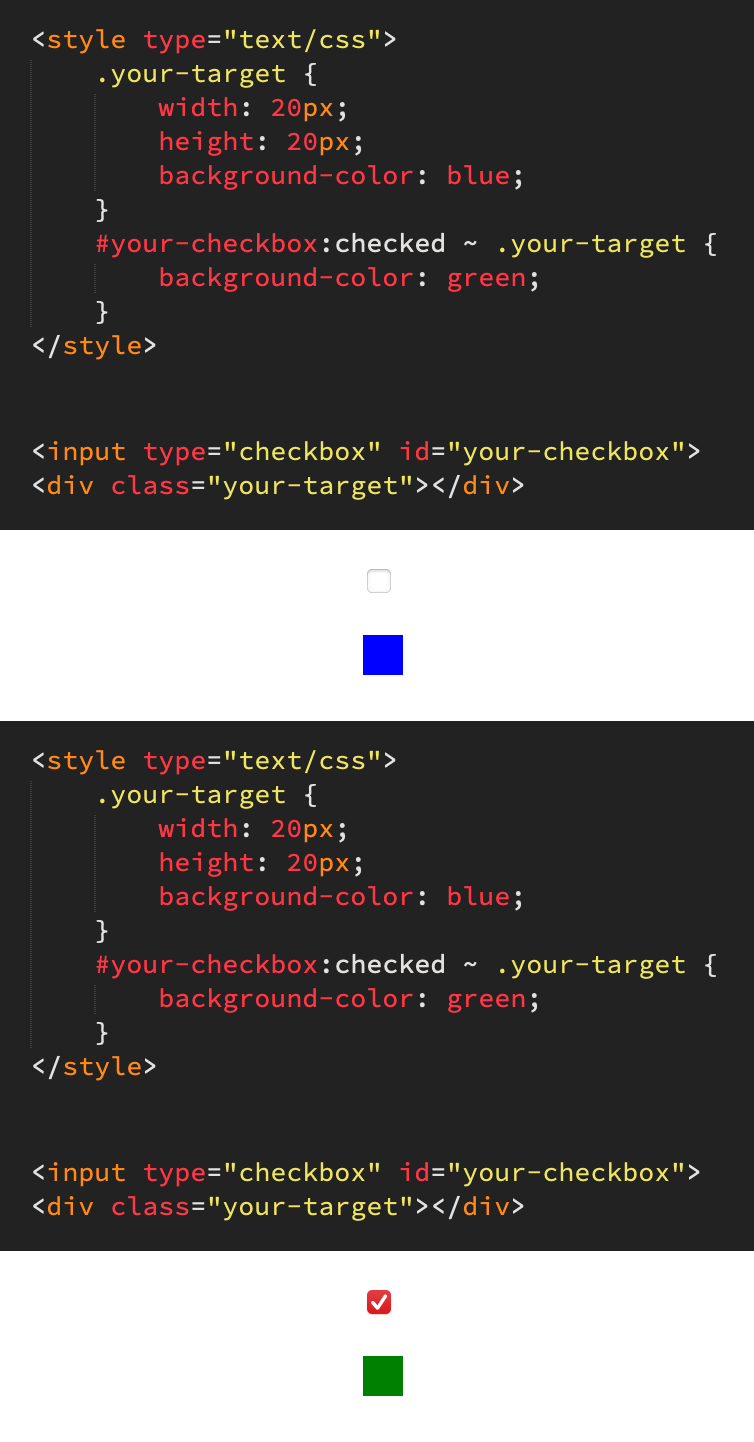
Animation demonstrating checkbox hack basics

While JavaScript has built-in functionality to generate a random number, HTML and CSS do not. And email of course is a JavaScript-free environment. But there is still one variable and unpredictable factor – user timing. We don’t know when the reader will hit the button. We can capitalise on that.

First, we place a series of identical-looking triggers. Next, we cycle through them rapidly. We’re talking milliseconds. The result of a click is equally random to developer and customer alike.

Let’s build it

We need some inputs. Radio buttons to be precise. Let’s say we have ten possible random results. Therefore we need ten triggers:


<input type="radio" name="radio-group" id="radio-1">
<input type="radio" name="radio-group" id="radio-2">
<input type="radio" name="radio-group" id="radio-3">
<input type="radio" name="radio-group" id="radio-4">
<input type="radio" name="radio-group" id="radio-5">
<input type="radio" name="radio-group" id="radio-6">
<input type="radio" name="radio-group" id="radio-7">
<input type="radio" name="radio-group" id="radio-8">
<input type="radio" name="radio-group" id="radio-9">
<input type="radio" name="radio-group" id="radio-10">

The name attribute is the same for all of our radio buttons, thus grouping them. Only one can be active at a time. This is extremely useful functionality for interactive email in general, and will be helpful here for testing.

The id attribute on the other hand is unique to each radio button. We’ll use these to identify which radio button has been pressed.

Secret message

Our triggers need something to, well, trigger. We’ll create ten div-wrapped messages to go along with our ten triggers. They’ll all be hidden at the start.

Even though this is a no-frills, bare-bones example, we’ll stick them in a container. That better resembles the structure of a full-on interactive email.


<div class="messages">
    <div class="message message-1">You pressed trigger 1</div>
    <div class="message message-2">You pressed trigger 2</div>
    <div class="message message-3">You pressed trigger 3</div>
    <div class="message message-4">You pressed trigger 4</div>
    <div class="message message-5">You pressed trigger 5</div>
    <div class="message message-6">You pressed trigger 6</div>
    <div class="message message-7">You pressed trigger 7</div>
    <div class="message message-8">You pressed trigger 8</div>
    <div class="message message-9">You pressed trigger 9</div>
    <div class="message message-10">You pressed trigger 10</div>
</div>

You’ll notice that they each have two class names. We’ll use one of those to to neatly hide all messages by default.


.message {
    display: none;
}

The other class name will act as a unique identifier. We could use an id tag, like we did for the radio buttons, but that can lead to CSS specificity problems for elements that we want to restyle in an interactive email.

Hook them up

Our triggers are in place. Our messages are in place. But they’re not connected yet. We’ll use the following CSS for that:

  • The general sibling selector. That’s the tilde. It’ll let us refer our inputs to the messages div which sits later in the document on the same level.
  • The descendant combinator. That’s a space between two target elements. It’ll let us connect to specific messages within their container.

#radio-1:checked ~ .messages .message-1 {
    display: block;
}
#radio-2:checked ~ .messages .message-2 {
    display: block;
}
#radio-3:checked ~ .messages .message-3 {
    display: block;
}
#radio-4:checked ~ .messages .message-4 {
    display: block;
}
#radio-5:checked ~ .messages .message-5 {
    display: block;
}
#radio-6:checked ~ .messages .message-6 {
    display: block;
}
#radio-7:checked ~ .messages .message-7 {
    display: block;
}
#radio-8:checked ~ .messages .message-8 {
    display: block;
}
#radio-9:checked ~ .messages .message-9 {
    display: block;
}
#radio-10:checked ~ .messages .message-10 {
    display: block;
}

Let’s try it. By clicking any radio button, the corresponding message will be displayed.
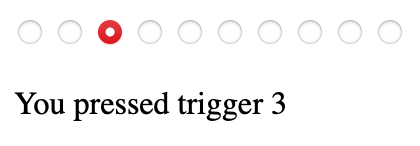
Example of checked input and corresponding message

Label it

We’re going to hide all of our radio buttons – permanently. That’s because there are very limited styling options for input elements and we don’t want our triggers to actually look like radio buttons. It’s better to think of them as the circuitry inside your interactive email, not the buttons that people push.


input[type=radio] {
    display: none;
}

And we’ll now create our labels. Using their for attribute we can tie them to their corresponding radio button:


<label for="radio-1">Surprise me</label>
<label for="radio-2">Surprise me</label>
<label for="radio-3">Surprise me</label>
<label for="radio-4">Surprise me</label>
<label for="radio-5">Surprise me</label>
<label for="radio-6">Surprise me</label>
<label for="radio-7">Surprise me</label>
<label for="radio-8">Surprise me</label>
<label for="radio-9">Surprise me</label>
<label for="radio-10">Surprise me</label>

They need some styling. How about a garish lime green and black outline?


label {
    display: block;
    width: 400px;
    text-align: center;
    padding: 20px 0;
    box-sizing: border-box;
    border: solid 2px black;
    box-sizing: border-box;
    background-color: lime;
    cursor: pointer;
}

That cursor property is handy for desktop users. Upon hover, the pointer icon will appear, indicating that the ‘button’ is pushable.

Start cycling

Our buttons are functional, but they’re just sitting there. In a big tower of buttons.
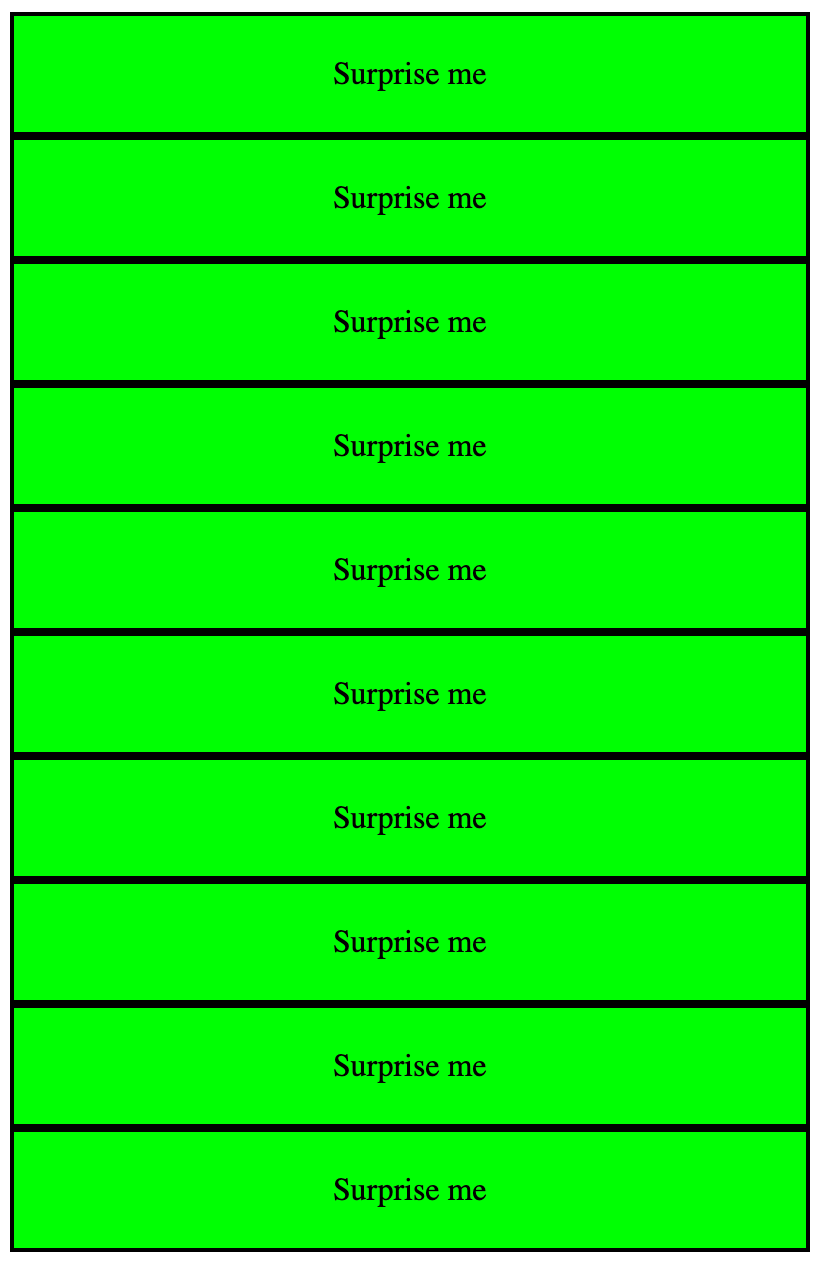
Screenshot showing all buttons on screen

We need to house them in two divs:

  • A viewing window with a hidden overflow. It’ll be sized to match the dimensions of a single button, while the other nine are hidden at any time.
  • A slider that will pull each button into view in turn. And to reiterate: this is a process that will take mere milliseconds.

We can put the HTML code into place first:


<div class="inputs-window">
    <div class="inputs-slider">
        <label for="radio-1">Surprise me<label>
        <label for="radio-2">Surprise me<label>
        <label for="radio-3">Surprise me<label>
        <label for="radio-4">Surprise me<label>
        <label for="radio-5">Surprise me<label>
        <label for="radio-6">Surprise me<label>
        <label for="radio-7">Surprise me<label>
        <label for="radio-8">Surprise me<label>
        <label for="radio-9">Surprise me<label>
        <label for="radio-10">Surprise me<label>
    <div>
<div>

And now for the CSS. Let’s start with the window. It’s pretty simple:


.inputs-window {
    width: 400px;
    overflow: hidden;
}

The width matches that of a button. We don’t need to specify a height, as it’ll automatically match that of its contents.

Next, we need the slider. There’s a lot more to explain here.


.inputs-slider {
    width: 1000%;
    display: grid;
    grid-template-columns: 1fr 1fr 1fr 1fr 1fr 1fr 1fr 1fr 1fr 1fr;
    animation-name: cycle-triggers;
    animation-duration: 0.01s;
    animation-iteration-count: infinite;
    animation-timing-function: steps(10);
}
@keyframes cycle-triggers {
    from { margin-left: 0; }
    to { margin-left: -1000%; }
}

The width is 1000% – i.e. ten times the width of the viewing window. That sizes it for our ten buttons.

We’re using a grid layout. Normally unheard of in email due to a general lack of compatibility, but we can use it here. Any email applications that can run the checkbox hack have decent CSS support in general. We’ve set up 10 columns, each sized to one fractional unit and thus taking up a tenth of the slider.

We use a keyframe animation to pull each button into place. An entire animation loop takes just 10 milliseconds, and runs infinitely. We don’t need to code all ten button positions into the animation. Instead we can make use of the steps functionality and set the ‘to’ value to the full 1000% slider width. Nice and succinct.

Hit pause

Uh oh – there’s a problem. It doesn’t work. That’s because a click is comprised of two parts: pressing the mouse button… and releasing it. These both need to take place on the same trigger. But we know that the triggers are cycling at a blistering pace. A human finger is glacially slow by comparison and a click could not possibly be completed on the same trigger.

We therefore need a means of pausing the trigger cycle. Thankfully, there’s a straightforward solution. We can pause the keyframe animation upon hover:


.inputs-slider:hover {
    animation-play-state: paused;
}

This hover state doubles up as ‘on touch’ for touchscreens. Now our triggers are held in place when the user interacts with them, allowing a full click to be completed.

Don’t leave functionality to chance

All emails need to be tested, but particularly those with interactive content. Things can and do go wrong!

In order to test all of our random triggers, we’ll temporarily slooooow our animation speed right down:


animation-duration: 5s;

And we can place an identifying number inside each of our otherwise-identical labels:


<label for="radio-1">Surprise me 1</label>
<label for="radio-2">Surprise me 2</label>
<label for="radio-3">Surprise me 3</label>
<label for="radio-4">Surprise me 4</label>
<label for="radio-5">Surprise me 5</label>
<label for="radio-6">Surprise me 6</label>
<label for="radio-7">Surprise me 7</label>
<label for="radio-8">Surprise me 8</label>
<label for="radio-9">Surprise me 9</label>
<label for="radio-10">Surprise me 10</label>

That gives you a solid half second to press each trigger in turn as they rotate. Now that you know everything works, you can revert to its previous state, safe in the knowledge that everything works as it should.

Jazz it up

Our example is purely functional. In a real interactive email, you can harness all of the power of CSS animation and create something special.

What’s the point?

Do you remember that amazing marketing email you got from [brand]? Me neither. Most marketing emails, frankly, are nothing special. But yours could be.

Randomisation encourages exploration of your products and services. It’s fun to interact with. Your subscribers might wonder what cool content you’ll be sending next time. And when your email engagement rates go up, there will be nothing random about that.
Email Marketing

Can I share a secret?

Question:

How do you go about building and sustaining your customer base in the crowded world of email marketing?

Answer:

Why not let your customers do some of the work for you?

This is where multichannel marketing comes in to play. You can reach your untapped potential through other channels than email, such as your own website or social media to encourage new signups to your brand.

But is there a missed avenue to gain even more signups? Your best advocates may turn out to be your own users – if you’ve created engaging, exciting content then why wouldn’t they want to shout about it? Make it easy for them.

Here’s how we do it…

Share on social media

Through us you have the option to share the whole email on social media, or to specify a URL instead for shareworthy articles. Built in to our platform are direct links to open new posts for Facebook, Google+, Twitter (X), LinkedIn or you can select “Generic” and build a link to any social media platform of your choosing.

From a coding perspective it is a doddle, it’s just adding a link tag into your template. If you want to share the whole email:

<a href="#" social-network="facebook">Share this email on Facebook</a>

<a href="#" social-network="linkedin">Share this email on LinkedIn</a>

Then a click on this links will simply set up the post ready to send:

Share to Facebook Post

Share to  LinkedIn Post

Or to set the post copy as a URL instead of the email image:

<a href="#" social-network="facebook" social-url=" https://www.theemailfactory.com/the_biz/how-ethical-are-your-emails/”>Share this email on Facebook</a>

For Twitter…excuse me X…you know the one I mean, you have the option to pre-write the tweet:

<a href="#" social-network="twitter" social-tweet="Check out this article: https://www.theemailfactory.com/the_biz/how-ethical-are-your-emails/”>Tweet this link</a>

Share on Twitter Post

Share by email

You might also encourage your users to share directly to their friends and family, people they would likely only target if they knew they already had an interest:

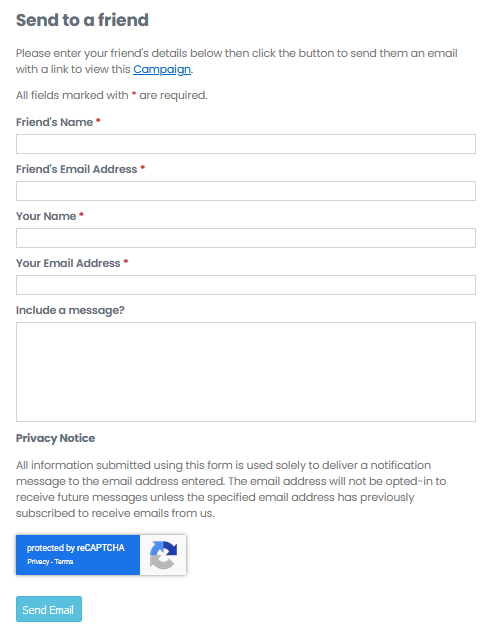
<a href="#" social-network="sendtofriend">Click here</a> to share this email with a friend.

This is slightly more involved as your user will have to fill out a few details, but if you’ve got them excited enough to share, that shouldn’t stop them!

Shsre with a Friend Form

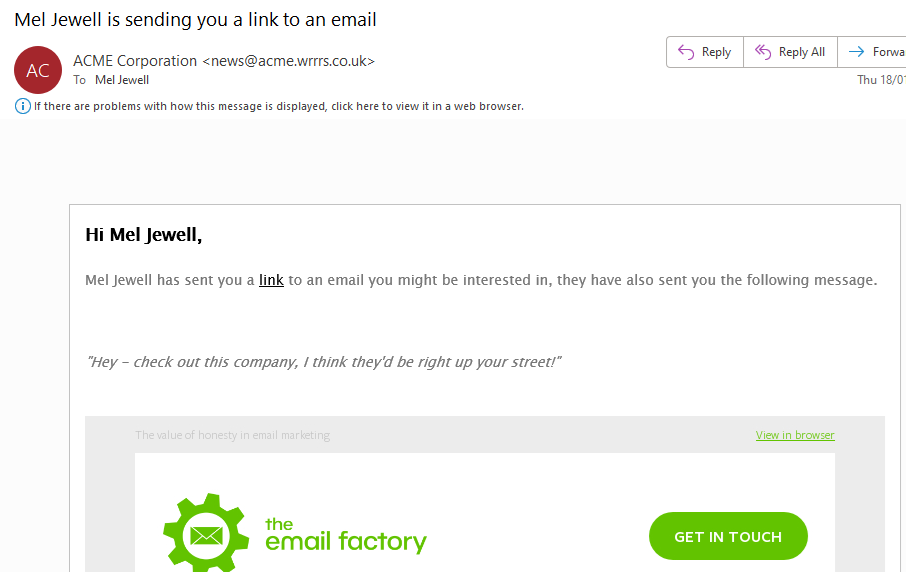
Once they’ve filled out the form, their lucky chosen recipient will receive an email with the message from their friend saying why they are receiving this email with just a sneak preview of what the email is and a link to the full thing:

Email Header

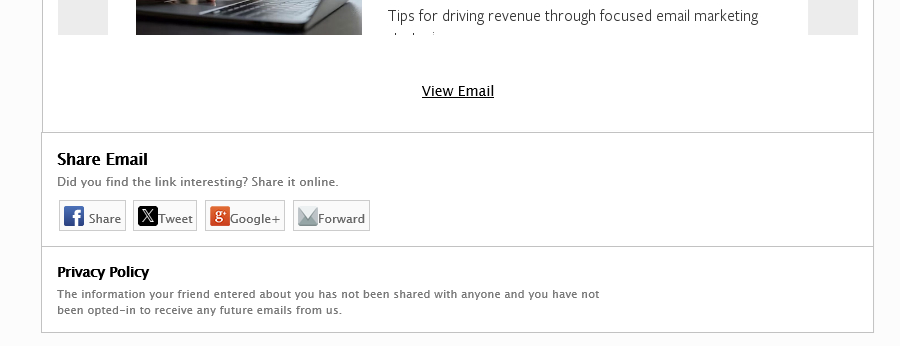
Then reassurance that they have not been added against their will to any mailing list and that their data privacy remains well and truly intact:

Email footer

By making it as easy as possible for your users to spread the word and share your content amongst themselves, it’s up to you to give them a reason. This should inspire you to create innovative, eye-catching emails with a great message that might just motivate your users to share, especially if all they have to do is click a link.

Here’s some ideas on adding interactivity to your emails which could be a good place to start! Not only will well designed and captivating emails help sustain your current base and stave off lethargy and loss of engagement, it might also help it grow if word starts getting around.

Interactive email

Four useful ideas for interactive email

You can do all sorts of things with the checkbox hack. But not all of them are useful. For the unfamiliar, the checkbox hack is a clever CSS trick that makes it possible to build interactive emails.

All email content must be useful to the customer, and interactive content is no exception. So, forget about those gimmicky drop-down nav menus product carousels. Let’s aim instead for the kind of interactivity that enriches our emails.

1. Rotatable products

It’s common on a retail websites to be able to view products from multiple angles. But in email there’s usually only a single, static product shot. It doesn’t need to be that way.

By assigning animation triggers to left and right arrows on either side of an image, you can let the user rotate a product right there in the email. Drop in a few frames of animation for each of the quarterly rotations and you can achieve an effective illusion of movement.

For our demo, I grabbed a mug from the kitchen. But just imagine this technique used for cars or any other product where every angle matters.

2. Colour selector

On the subject of cars – they tend to come in a variety of colours. So too do clothes, phones, items of furniture, toasters… and so on. You can guess where this is going.

Place some colour swatches next to the product image and let the user browse all colours before committing to a website visit. This isn’t just a cosmetic effect. Whilst swapping out the image, you can also swap the link, thus directing the customer straight to their chosen colour variation on your web page.

3. Multiple choice quiz

But maybe your customer isn’t so sure about what they want. Why not guide them? A multiple-choice quiz is the perfect way to present the customer with a result based on their personal interests… and you don’t even need any prior data. In fact, you can even use it to start building up a customer profile by tracking the links. How good is that?

Our demo uses a topic close to my heart: dogs. There are 18 possible combinations of answers, each leading to a specific breed of dog. This technique could of course be used for any topic under the sun. Perfect holiday destination, perfect perfume, perfect anything-you-like.

4. Randomiser

Oh, about those holiday destinations – sometimes it’s fun just to spin the globe and discover somewhere completely new. Well, you can do that in email too. Engage your customer’s curiosity with randomisation.

Here’s how it works: you can secretly cycle a series of identical-looking buttons. The random factor is time – i.e. when the user clicks the button. Dress that up in some fancy animation and you’ve created an engaging piece of content based on the element of surprise.

We’ve chosen holiday destinations for our demo, but as always you could pick any topic you like. The possibilities are endless.

What else can you think of?

Done right, interactive content can really bring an email to life. With a bit of imagination, the medium of email can be transformed into something incredible. (Just don’t forget that fallback content for non-compatible email apps!)